Improving Your Painting Ability By Following These Steps
Introduction
Picture this: it is Saturday morning in Georgina. The old beige walls are driving everyone a bit crazy, and the new paint colour looks perfect in the can. A couple of hours later, there are streaks and drips on the baseboards and fuzzy lines where the wall meets the trim. Calling a handyman suddenly starts to sound tempting.
This phenomenon happens all the time. Painting looks simple, yet small misses in prep or technique show up on the wall right away. On the other hand, a clean, smooth paint job can make a home in Georgina or nearby communities feel brighter, larger, and more modern, and it can add real resale value. Fresh trim and crown moulding painted properly also make every room feel finished, not just “touched up.”
This guide lays out the same step‑by‑step approach that JFB Painting and Handyman Services uses on real homes. It walks through preparation, primer, brush and roller techniques, tape and multi‑color layouts, paint choices, safety, and long‑term care. By the end, anyone who likes DIY will understand how professional painters think, and anyone considering hiring a handyman will know exactly what a proper job looks like and when it is smarter to call JFB.
Key Takeaways
Thorough surface preparation significantly contributes to the success of any paint job. When walls and trim are cleaned, repaired, and sanded properly, paint sticks better, covers faster, and stays fresh for many years instead of peeling after the first couple of winters.
The tools in your hand matter almost as much as the paint on your roller. Quality brushes, roller covers, tape, and drop cloths help you work faster, keep neat lines, and avoid the frustration that leads many people to give up and call a handyman halfway through.
Primer and paint need to match the surface and the room. Picking the right primer, paint type, and sheen for bathrooms, basements, trim, and doors gives you better coverage, easier cleaning, and a finish that stands up to Ontario’s humidity and temperature swings.
Professional techniques such as cutting in, W‑pattern rolling, and careful tape work are skills anyone can learn with practice. When they come together with excellent prep, your DIY painting starts to look like something a pro crew or experienced handyman completed.
Safety, cleanup, and knowing when to hand the brushes to JFB Painting and Handyman Services are all part of a smart plan. Good protection, proper ladders, and assistance from a local handyman keep your home and everyone in it safe when a project is too high, too big, or too detailed.
Understanding The Foundation: Why Proper Preparation Matters
There is an old saying in the trade that a beautiful, long‑lasting paint job is about eighty percent preparation and twenty percent application.
As many professional painters like to say, “Prep is 80 percent of the job, and the paint is the other 20 percent.”
Professionals in Georgina live by this idea because they see what happens when people skip steps. Paint may look fine on day one, but within a year it starts peeling, cracking, or showing every patch line.
Unprepared surfaces cause several problems. Dust and grease stop paint from bonding, glossy areas cause flashing where the sheen changes, and unfilled nail holes or cracks show through even expensive paint. In bathrooms or basements, leftover moisture and soap film can lead to blisters and mould stains that no topcoat can hide for long.
Different surfaces also behave very differently. Drywall, wood trim, older oil‑based finishes, and previous DIY work each need their own prep approach. In Georgina’s mix of newer builds and older cottages, JFB Painting and Handyman Services often finds layers of old paint, shifting from seasonal movement, and watermarks from past leaks, so our crews always start with a careful inspection and a prep‑first mindset.
Good preparation often takes longer than the actual painting, and that can feel slow when someone just wants colour on the wall. The payoff is simple, though. When cleaning, repairs, and sanding are done right, primer and paint go on smoothly, cover better, and stay put through many Ontario winters, which is precisely what the next steps will help you do.
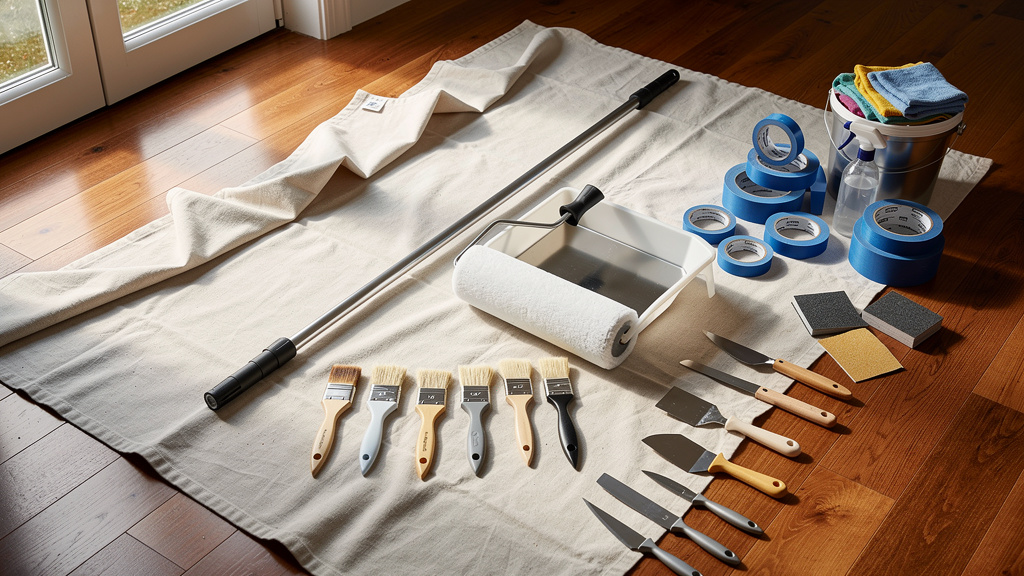 |
| Display of tools and brushes you will need for your project |
Essential Tools And Materials For Professional Results
A lot of frustration with DIY painting comes from fighting cheap brushes, shedding roller covers, and thin plastic drop sheets that slide around. Good tools cost more at the cash register, but they save time, waste less paint, and give a more professional finish, even for a first‑time painter.
Preparation Tools
The right prep tools make it easy to give paint something solid to grip. A small set of scrapers and putty knives lets you remove loose paint, old caulking, and bumps, and then apply filler smoothly to nail holes and dents. A range of sandpaper grits and sanding blocks, usually around 120 for repairs and 220 for final smoothing, helps flatten patches so they disappear once painted.
A simple caulking gun with quality paintable caulk closes gaps along trim and crown moulding, which stops drafts and shadows at the same time. Cleaning products, such as a TSP substitute or a liquid deglosser, cut through kitchen grease and bathroom residue so new paint bonds instead of sliding. Painter’s tape and proper drop cloths finish the kit, protecting edges and floors while you work.
A basic preparation kit might include:
Scrapers and putty knives in a few widths
Sandpaper (120 and 220 grits) and sanding sponges
TSP substitute or similar cleaner
Liquid deglosser for glossy areas
Caulking gun and paintable caulk
Painter’s tape and canvas drop cloths
Application Tools
Once the surfaces are ready, application tools decide how smooth and even the finish will look. A premium angled sash brush around 2.5 inches wide is the workhorse for cutting in along ceilings and trim lines, while a smaller 1.5‑inch brush gives more control on narrow trim and detailed woodwork. Synthetic bristles work best with modern water‑based paints, and natural bristles still shine with traditional oil‑based paints.
A sturdy roller frame with a comfortable handle, plus an extension pole, makes rolling walls and ceilings far easier on the shoulders. Roller covers with the right nap are also key, with shorter naps for smooth walls and longer naps for textured surfaces. A paint tray with a metal liner or a five‑gallon bucket with a roller grid keeps the roller loaded evenly and cuts down on spills. For huge areas or cabinet projects, a sprayer can be helpful, but for most Georgina homes a brush and roller still give the best control.
Safety And Organization
Professional painters think about safety and organization before the first drop of paint hits a wall. Safety glasses protect eyes from scraping dust and overhead sanding, and a proper mask or respirator keeps primer fumes and fine dust out of the lungs. A solid ladder that is the right height for the room is far safer than balancing on a chair or table.
Work gloves protect hands during rough prep work and when handling chemicals such as TSP or mineral spirits. A small fan set in a window can move air through the room without blowing dust directly onto fresh paint. Keeping tools laid out in a logical order, with paint cans closed when not in use, reduces accidents and wasted time. At JFB Painting and Handyman Services, this kind of planning is part of every project because it helps our painters and handymen work safely and efficiently in Georgina homes.
Step 1: Comprehensive Surface Preparation Techniques
Every professional painter, and every competent handyman who offers painting, spends more time getting surfaces ready than actually rolling colour on the wall. A smart sequence starts with cleaning and gloss removal, moves through repairs, and ends with careful sanding and dust control. When you follow that order, primer and paint have a solid, smooth base.
Cleaning And Deglossing
Painting over kitchen grease, hairspray, soap film, or kids’ fingerprints is a quick way to get peeling paint and strange shiny spots. A mild TSP substitute mixed with warm water is enough for most walls, and you can wipe it on with a sponge, then rinse with clean water. On glossy trim and cabinets, liquid deglosser or a combination of light sanding and cleaner dulls the shine so primer can bond.
Bathrooms and laundry rooms in Georgina homes often need extra attention because of steam and moisture. Let cleaned surfaces dry fully, often overnight, before you move on. On very slick surfaces, such as an old oil‑based door, taking the time to degloss properly means the new paint stays put instead of chipping off at the first bump.
 |
| Displaying how to patch a hole in the wall part of the prep work |
Repairing Surface Defects
Once walls are clean, every dent, crack, and nail pop becomes easier to see. Use a scraper to remove any loose paint or flaking areas, keeping the blade at a low angle so you do not gouge the surface further. Fill small nail holes and shallow dings with a lightweight spackling compound, then let it dry fully.
Larger holes and stress cracks need a bit more structure. Self‑adhesive mesh tape over the damaged area, followed by thin layers of joint compound feathered out beyond the edges, keeps repairs from cracking again. Any area with past water damage should be checked to make sure the leak is fixed, stained or softened drywall is removed, and any mould is treated before patching. JFB’s training handbooks walk new painters through this exact repair process, because neat repairs disappear once painted, and sloppy ones show forever.
Sanding For Perfection
Sanding is the step many people rush, but it is the secret behind those perfectly smooth walls seen in magazines. Start with a medium grit, such as 120, over repair areas to knock down ridges, and finish with a fine 220 grit to blend repairs into the surrounding surface. Use light, even pressure and smooth, overlapping strokes rather than pressing hard.
Sanding between coats of primer and paint, especially on trim and doors, gives an extra‑smooth finish and helps each layer bond. Vacuum or wipe down the walls, trim, and especially the tops of baseboards with a damp microfiber cloth so dust does not end up in your paint. For detailed trim and crown moulding, a soft sanding sponge shaped to the profile helps you smooth without changing the shape of the wood.
Step 2: Mastering Primer Selection and Application
Primer is the bridge between your prepared surface and your topcoat. It sticks to the surface, seals in stains and previous colours, and gives the paint an even base, so the colour looks the same from corner to corner. Skipping primer can work in a few forgiving situations, but most Georgina homes benefit from the right primer under the paint.
Understanding Primer Types And Their Applications
 |
| Roller painting the wall going over the first coat |
Water‑based or latex primers are the everyday choice for new drywall and most previously painted walls. They dry quickly, smell mild, and clean easily with water, which makes them a favourite for bedrooms, living rooms, and hallways. Oil‑based primers stick very well to old glossy finishes and do an excellent job blocking stains from water, smoke, or wood tannins, though they take longer to dry and need mineral spirits for cleanup.
Shellac‑based primers sit at the top of the stain‑blocking ladder for extreme situations such as heavy smoke damage or deep water stains that have bled through other products. Bonding primers are made for very slick surfaces like tile, laminate, and some plastics, giving paint something to grip where it would otherwise slide. There are also special primers with added mould resistance for bathrooms and damp basements and high-hide versions for drastic colour changes, like going from dark red to light grey. JFB Painting and Handyman Services leans on this range of primers so each room in a Georgina home gets the base that suits its surface and conditions.
Professional Primer Application Technique
Applying primer is less about perfection and more about even coverage and sealing. Start by cutting in along ceilings, corners, and around trim with a nicely angled brush, keeping a steady line so roller marks can blend into it later. Then roll the walls in sections, loading the roller enough to cover but not drip, and work from dry areas into wet edges to avoid lines.
On bare drywall or raw wood, the first coat of primer can soak in, so a second coat is sometimes needed for full sealing. Temperature and humidity play a big role in drying time, especially in Ontario basements or during damp spring days, so give primer the full time listed on the can before painting. Lightly sand the raised fibres on wood trim or any rough spots on walls after primer smooths the surface further. When the primed surface has an even, dull sheen with no shadowy patches, it is ready for colouring.
Step 3: Advanced Brush Techniques For Clean Lines And Smooth Coverage
Brushwork is one of the clearest differences between a rushed DIY job and professional painting by an experienced handyman or crew. Smooth, straight lines around trims, ceilings and doors without heavy brush marks do not come from expensive paint alone. They are derived from how the brush is held, loaded, and moved.
Loading And Holding The Brush Correctly
A brush works best when it feels like an extension of your hand, not a broom. For precision work, hold it like a pencil near the metal ferrule so your fingers can guide the bristles along the line, and use a fuller grip on the handle for broad areas. To get paint into the brush, dip the bottom third of the bristles, then tap each side against the can or pail.
Avoid scraping the brush hard across the rim, because that strips too much paint and leads to drag marks. On the wall, use light to medium pressure and let the paint flow off the brush instead of forcing it. Before starting on your best room, practice on cardboard or scrap wood until the motion feels smooth and repeatable.
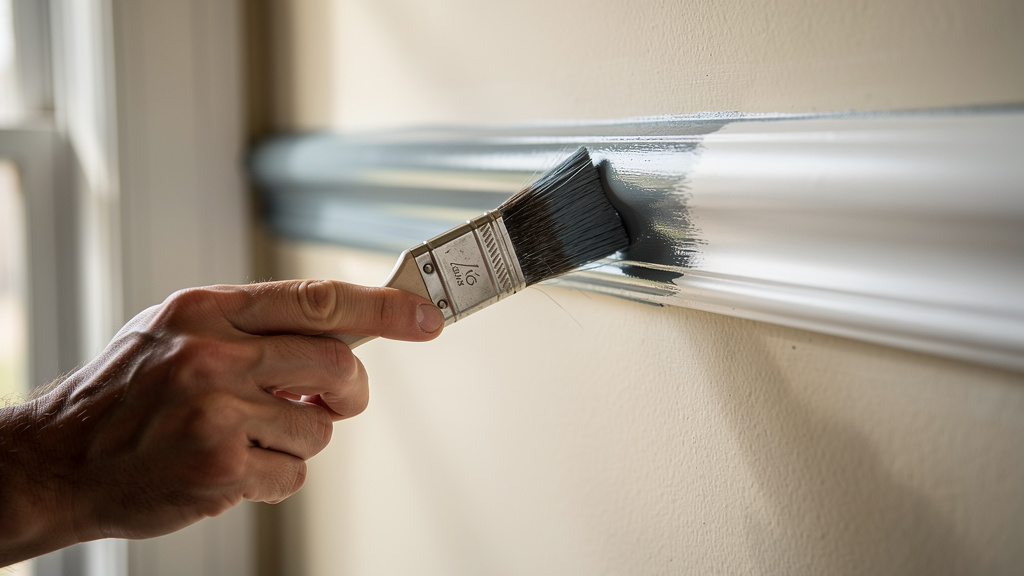 |
| Using a brush to paint a moulding a different colour from wall colour |
Mastering The "Cutting In" Technique
Cutting in means painting a clean, straight edge where two colours meet, such as wall to ceiling or wall to trim, often without tape. Load the angled brush evenly, set the bristle tips just away from the edge, then gently press until the bristles fan out and just touch the line. Move your hand steadily along the edge, keeping the same pressure so the line stays even.
As you go, pull the paint down a few centimetres onto the wall so the roller can blend in while the edge is still wet. For crown moulding and other detailed trim common in Georgina homes, good lighting and a stable ladder position make a big difference. Resting your little finger lightly against the wall or trim as a guide can steady your hand. With practice, cutting in becomes faster and cleaner than taping every edge.
Brushwork For Trim, Doors, And Detailed Woodwork
Trim and doors attract attention, making sloppy brush marks immediately noticeable. A smaller angled brush between 1.5 and 2 inches gives better control on baseboards, casings, and window trim. Load the brush, apply paint along a short section, then immediately go back with just the tips of the bristles and smooth in long strokes in the direction of the wood grain.
On panelled doors, paint the recessed panels first, then the horizontal rails, and finish with the vertical stiles to keep a consistent flow. Thin coats dry harder and smoother than one heavy coat, so plan on at least two passes. For crown moulding, work from a secure ladder, keep the brush lightly loaded, and use long, gentle strokes to follow the profile.
Step 4: Professional Roller Application Techniques
Rollers are the workhorses for walls and ceilings. Used well, they give fast, even coverage with a soft, consistent texture. Used poorly, they leave heavy lines, patchy areas, and a rough finish that no one is happy with.
Loading The Roller Properly
A properly loaded roller feels full but does not drip. In a tray, roll the cover through the paint well, then up the ridged area several times so the paint spreads evenly across the surface. In a bucket with a roller grid, dip the cover partway into the paint, then roll it against the grid until the nap is saturated but not heavy.
Check both ends of the roller to be certain they carry similar amounts of paint, because dry edges leave tracks. Reload before the roller starts to sound sticky or look patchy on the wall. That way, each section gets the same amount of paint, and you are not forced to press harder to squeeze out the last bit.
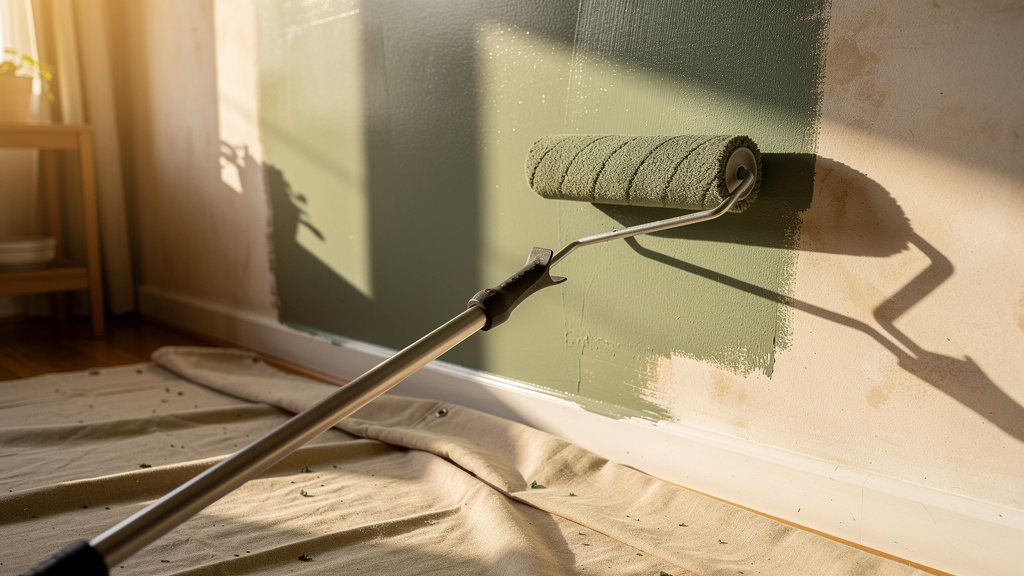 |
| Using your roller on the wall using the proper technique |
The W-Pattern And Back-Rolling Technique
The W‑pattern is a simple method that keeps coverage even and blends sections together. Start by rolling a loose W shape about one meter wide and one meter high on the wall without lifting the roller. Then, without reloading, roll back and forth to fill in that whole rectangle, spreading the paint smoothly over the area.
Finish by lightly rolling straight up and down across the section from top to bottom with almost no pressure, which levels the texture and removes heavy lines. Each new section should overlap the last while the paint is still wet so no lap marks appear. For ceilings, the same pattern works, though you may need to reload more often because gravity makes the roller give up paint faster.
Achieving A Professional Finish: Second Coats And Final Inspection
Most walls look their best with at least two coats of paint. Follow the drying time on the can, which is often about two to four hours for latex, but remember that cooler rooms or damp days in Georgina basements can slow this down. On very smooth or high‑visibility areas, a quick pass with fine sandpaper between coats knocks down dust nibs and leaves a silky finish.
Apply the second coat using the same W‑pattern and back‑rolling so the texture stays consistent. Once everything is dry, look at the walls and trim under different lighting and from several angles so you can spot thin areas, missed spots, or drips. Touch up with a small brush where needed. A professional or handyman standard is a room that looks even and clean regardless of where the light hits.
Step 5: Precision Work With Painter's Tape And Multi-Colour Schemes
While many painters rarely use tape for basic cutting in, it is very helpful for anyone building skills and for detailed designs such as stripes or geometric patterns. Tape work is its own skill, and rushed taping often leads to paint bleeding underneath, torn edges, and frustration.
Strategic Tape Application For Crisp Lines
Good tape starts with a clean, dry surface, so dust and oils do not stop it from sticking. Choose a quality painter’s tape meant for walls, such as well‑known green or blue brands with clean release glue, instead of general masking tape. Apply the tape along the line you want, then press firmly along the edge with a putty knife, plastic card, or even your thumbnail so the edge seals tightly.
For the sharpest line, first paint a thin coat of the base wall colour along the tape edge and let it dry. Any tiny gaps under the tape fill them with the same colour, which blocks the new colour from sneaking underneath. When you paint the new colour, use strokes that move away from the tape rather than pushing paint onto the edge. Remove the tape while the paint is still a bit tacky and pull it back at a shallow angle for a clean break. If a little bleed does happen, a light sand and a careful touch‑up with a small artist’s brush fix it.
Planning And Executing Multi-Colour Schemes
Crisp and well-planned feature walls, stripes, and shapes can significantly enhance the visual appeal. Start by sketching the idea and testing colours together on the wall so you can see them in the room’s real light. A laser level, similar to what JFB handymen use for trim and layout work, is very helpful for straight stripes or balanced geometric patterns.
When using more than one colour, paint the lightest first over the whole area and let it cure fully before tapping on top of it. Measure and mark stripe widths or shapes carefully, then tape along the outside of the lines that will stay light. Use the same base‑color sealing trick on each tape line before rolling the darker shade. Take extra care at corners and along ceilings so lines meet neatly. If the design starts to feel too complex or covers several large walls, that is a good moment to consider calling JFB Painting and Handyman Services to handle the layout and painting for you.
Step 6: Selecting The Right Paint Types And Finishes For Each Room
Standing in the paint aisle in Keswick or Sutton can be confusing, with rows of cans offering different bases, finishes, and special features. Picking the right combination for each room makes the job easier and gives a finish that suits how the space is actually used.
Understanding Paint Types: Water-Based vs. Oil-Based
Modern water‑based paints, often called latex or acrylic, are the standard choice for most interior walls and ceilings. They dry quickly, have a lower odour, are cleaned up with water, and flex a bit with seasonal movement, which helps prevent cracking in Georgina’s changing weather. They work well in living rooms, bedrooms, and general areas, and newer formulas have excellent durability.
Oil‑based or alkyd paints were once used almost everywhere because they dry to a rigid, smooth film that levels out brush marks beautifully. They still shine on trim, doors, and cabinets, where extra toughness is helpful, but they smell stronger, take longer to dry, and need solvents for cleaning tools. Many brands now offer hybrid paints that combine water cleanup with oil-like hardness, which makes them a smart middle ground for busy homes.
Selecting The Ideal Finish For Every Surface
Sheen, or how shiny the paint looks once dry, affects both appearance and durability. The basic options are shown here.
Finish | Light Reflection | Durability | Washability | Best Uses |
|---|
Flat/Matte | Very low | Lower | Harder | Ceilings, low‑traffic rooms, hiding wall flaws |
Eggshell | Soft | Medium | Medium | Living rooms, dining rooms, adult bedrooms |
Satin | Gentle sheen | Good | Easy | Hallways, kids’ rooms, family spaces, some kitchens |
Semi‑Gloss | Noticeable | High | Very easy | Trim, doors, cabinets, bathrooms, laundry areas |
High‑Gloss | Very shiny | Very high | Very easy | Feature trim, furniture, front doors |
For most Georgina homes, eggshell or satin works well on main walls because they balance a soft look with the ability to handle cleaning. Kitchens and bathrooms benefit from satin or semi‑gloss so steam and splashes can be wiped away without leaving dull spots. Semi‑gloss on trim, doors, and crown moulding creates a pleasing contrast with flatter walls and stands up to bumps and fingerprints. Ceilings usually look best in flat white, which hides small dents and keeps light from bouncing in odd ways. JFB Painting and Handyman Services helps homeowners match these options to their rooms and lifestyles, so paint keeps looking appealing between full repaints.
Step 7: Protecting Your Work Area And Achieving Efficient Cleanup
People often judge a painting crew or handyman not only by the finished walls but also by how clean the room looks afterward. Protecting floors, furniture, and fixtures from the start saves hours of scrubbing later and avoids damage that can cost far more than the paint itself.
Comprehensive Work Area Protection
Before opening a can, move as much furniture out of the room as possible, and group the rest in the centre under plastic. Canvas drop cloths are ideal for floors because they absorb drips and do not slide when you walk or move ladders. Light plastic sheets work well over furniture and fixtures where slipping is less of a concern.
Overlap Drop cloths slightly so no floor shows through and tape them gently along the edges if needed to stop gaps from opening. Remove switch plates and outlet covers and put the screws in a small container so they do not vanish. Cover light fixtures and ceiling fans with plastic or a clean bag to keep dust and splatter off them. In areas with a lot of sanding, hanging plastic in doorways and covering HVAC vents helps keep dust out of the rest of the house.
Efficient And Thorough Cleanup Practices
Cleaning while paint is still fresh is far easier than trying to rescue dried brushes and rollers. For water‑based paints, rinse tools in warm water with a bit of mild soap until the water runs clear, spin or shake out the extra water, and reshape bristles before letting them dry. For oil‑based products, work in a well‑ventilated area with the proper solvent, then wash with soap and water after the bulk of the paint is out.
If you plan to apply a second coat the same day, slip rollers and brushes into airtight plastic bags so they do not dry out between coats. Take tape off slowly, folding it onto itself as you go so sticky edges do not touch freshly painted walls. Fold drop cloths with the painted side inward so any wet spots do not smear on other surfaces. At JFB, our painters and handymen finish every job with a walk‑through and a tidy workspace, and you can follow the same habit by checking each room for stray splatters before calling the project complete.
When To DIY vs. When To Hire A Professional Handyman For Painting Projects
There is a real sense of pride in standing back and looking at a room you painted yourself. At the same time, some projects are simply bigger, higher, or trickier than most people want to handle on evenings and weekends. Knowing where that line sits helps you choose between DIY and bringing in JFB Painting and Handyman Services.
Ideal Projects For The Confident DIY Painter
Smaller, straightforward rooms are great practice for building painting skills. Bedrooms, home offices, and simple living rooms with eight‑foot ceilings and basic trim are very manageable once you understand prep, primer, and basic brush and roller work. Feature walls in a living room or bedroom are also a fun way to add colour without covering the whole space.
Projects go better when you can:
Spread the work over a few days without rushing
Avoid drastic colour changes on your first attempts
Work safely from a step ladder you feel steady on
Invest in decent tools instead of the cheapest kit available
Guides like this one from JFB, plus a bit of practice in a low‑traffic room, can take your skills up a level before you tackle the main floor.
When To Call JFB Painting And Handyman Services
Some jobs are perfect for a professional painter or handyman crew. Whole‑home interiors, several rooms at once, or exteriors with high peaks demand more time, equipment, and planning than most people want to take on alone. High or vaulted ceilings, stairwells, and tall exterior walls are much safer for a trained team with proper ladders, planks, and safety gear.
Homes with much trim detail, wainscoting, coffered ceilings, or fancy crown moulding need careful brushwork and a steady hand. Challenging surfaces such as damaged plaster, textured ceilings, brick, or walls with layers of old wallpaper call for experience in repair as well as painting. Dramatic colour shifts, kitchen cabinet refinishings, and time-sensitive projects before a house sale are all good reasons to call JFB. Our painters and handymen can also handle related tasks in the same visit, such as drywall repairs, caulking, small carpentry around trim, and hardware changes, which makes us a one‑stop service for Georgina homeowners.
Essential Safety Practices For Painting Projects
Good painting should never come at the cost of anyone’s health. Most accidents around DIY work happen because of rushed ladder use, poor ventilation, or a lack of simple protective gear. Professional painters and handymen treat safety as part of the job, not an add‑on.
A common saying on job sites is, “No paint job is worth a fall or a trip to the emergency room.”
Working Safely At Heights
Falls from ladders cause many serious home repair injuries, yet most are easy to avoid with a few habits. Pick a ladder that is tall enough so you can reach the area without standing on the top rungs, and always set it on firm, level ground with the spreaders locked in place. When using an extension ladder, keep the base far enough from the wall so the ladder leans at a safe angle, rather than almost straight up.
While climbing, maintain three points of contact with the ladder, such as two feet and one hand, and avoid leaning sideways to reach just a little farther. It is safer and faster in the long run to climb down and move the ladder more often. For big ceiling areas or high walls, small scaffolding or work platforms can offer a more stable base. Whenever possible, have another person at home while you work so someone can steady the ladder and help if needed. JFB crews always match the right access gear to the job, and DIY painters should follow the same careful approach.
Protecting Yourself From Fumes And Dust
You should keep particles and vapours released by paints, primers, and sanding out of your lungs and eyes. Choose low‑VOC or zero‑VOC paints whenever possible, especially for bedrooms and nurseries, and keep windows open to move fresh air through the room. A small fan in a window pointing outward can help pull fumes out without blowing dust onto wet paint.
When sanding, wear a dust mask or respirator rated for fine particles, and use a different cartridge mask for stronger oil‑based products or spray work. Take regular breaks, especially in warm weather, and step outside for a few minutes of fresh air. Keep children and pets out of the work area until walls are dry and any strong smell has faded. Wearing gloves when using TSP, deglosser, or solvents protects your skin, and safety glasses stop dust and splashes from getting into your eyes. If anyone in the home is pregnant or has breathing issues, it may be wise to have a professional handyman crew such as JFB handle the painting while they stay away from the work.
Maintaining Your Beautiful Paint Job: Long-Term Care Tips
Once a room looks fresh and clean, a little care goes a long way toward keeping it that way. Proper maintenance delays full repainting and keeps Georgina's homes looking sharp between bigger projects.
Dust walls and trim every few months with a soft cloth or microfiber duster so dirt does not build up and stick to the paint.
For marks and fingerprints, use a damp sponge with mild soap, and test a small area first, especially on flat finishes that are easier to mark.
Remember that semi‑gloss and satin handle gentle scrubbing better and are easier to keep bright in busy areas.
Touch up small chips and scuffs before they grow into larger worn patches. Saving a small, labelled container of each colour makes this easy, and a soft artist’s brush can blend touch-ups into the surrounding area. After winter, check around windows, doors, and exterior walls for water stains, peeling, or cracked caulking that might let moisture in. On the outside, look for peeling or faded paint on trim and siding each spring, and plan small handyman repairs with JFB before problems spread.
Conclusion
Painting is one of the most cost-effective ways to transform the feel of a home, and the process almost always determines the difference between a rough job and a smooth, professional finish. When surfaces are cleaned, repaired, sanded, primed, and painted with the right tools and techniques, even a simple colour change can make rooms in Georgina's homes feel fresh and cared for.
By following the steps in this guide, anyone can raise their painting skills. Careful prep, smart primer choice, solid brush and roller habits, thoughtful tape work, and the right paint sheen for each room all work together. Add in safe work practices, good protection, and regular upkeep, and your walls and trim will stay in good shape through many seasons.
If a project feels too big, too high, or just too important to risk learning as you go, JFB Painting and Handyman Services is ready to help. Our painters and handymen bring local experience, careful prep, and clean work habits to every Georgina‑area home. Whether you want full professional painting or a handyman to handle the tricky parts while you do the rest, we are only a call away.
FAQs
Do I Really Need to Use Primer on Every Painting Project?
Not every surface needs a separate primer, but many do. New drywall, patched walls, stained areas, bare wood, and any glossy or unknown old paint should be primed so the topcoat bonds and covers evenly. In some light color‑over‑color repaints with sound existing paint, a self‑priming wall paint can be enough, but JFB often still uses a dedicated primer in problem spots.
How many coats of paint should I plan for my walls?
For most interior walls, two coats of good-quality paint over a suitable primer give solid colour and even sheen. If light colours cover very dark ones, or vice versa, a third coat may be necessary, particularly in bright light. Planning for at least two coats from the start helps schedule your work and gives a better result than trying to make one heavy coat do the job.
What Should I Paint First, the Walls or the Trim?
Many professionals, including JFB Painting and Handyman Services, prefer to paint ceilings first, then walls, and finish with trim and doors. This ensures that you can conceal any minor splatters from rolling walls during the trim process. When repainting a room completely, following this order maintains cleaner edges and minimizes the need for touch-ups.
How Long Should I Wait Before Sleeping in a Freshly Painted Bedroom?
With modern low‑VOC water‑based paints, most smells fade within a day. Keep windows open and a fan running to move air through the room, and wait until the paint is dry to the touch and the odour is mild. People with sensitive lungs, young children, or anyone pregnant may want to wait a full day or two or have a professional handyman crew handle the work while they stay in another part of the home.
Regards,
Joseph F. Botelho
Ready for a Home Makeover?
Stop putting off those repairs! We specialize in expert painting and reliable handyman services right here in the area. From applying a fresh coat of paint to fixing nagging household issues, we handle the hard work so you don't have to.
[Click Here to View Our Full Services List] Get a Free Estimate Today!
About the Author – JFB Handyman
JFB Painting and Handyman Services has been proudly serving homeowners since 2018, providing reliable, detail-focused home maintenance, repairs, and improvement services. With years of hands-on experience solving real foundation, soil, drainage, and structural issues, JFB Handyman brings practical knowledge to every project and every article.
From small fixes to complex home challenges, the goal has always been the same: deliver honest workmanship, protect your investment, and help homeowners understand how to keep their property in top condition. This commitment to quality, transparency, and long-term solutions has made JFB Handyman a trusted name in local home repair.