Friday, October 18, 2024

"Probably the hardest ceiling I've ever painted was this one"


October 17, 2024

We would like to share this project with all of our followers. Priming an OBS board is never an effortless task. At my age, the challenge is fulfilling. 

This project is intriguing for numerous reasons. One reason it's intriguing is that it's a very difficult painting job, with numerous factors contributing to its intrigue. As you know, the entire 40'x22'x13' is made of OBS (Oriented Strand Board). One, I am rolling all of the primer on the walls and ceilings. Provides an enormous amount of endurance. 

My client expresses his desire to add three distinct colours to the walls throughout the entire working area. This will require the use of a laser for precision. We need to outlay each section of the wall colours, so it will require a lot of taping. This is the extent of my progress. Let's go over the details of what needs to be done.

Embarking on a Demanding Painting Project

Is the process of priming a large Oriented Strand Board (OBS) board something you are considering? This intimidating task can be quite difficult, particularly for individuals who have only a limited amount of experience painting. During the course of working on a 40'x22'x13' OBS board priming project, I obtained a number of insights and experiences that I will discuss in this post.

A short video of what we have done so far

The Unique Challenges of OBS Priming

Priming OBS boards presents several distinct challenges.

  • Therefore, it is essential to apply a suitable primer coat, as OBS is a porous material that can absorb paint in a short amount of time.
  • The surface texture of OBS can be quite rough, which can make it challenging to achieve a smooth and even finish for the material.
  • Due to its overall size, priming a large OBS board requires a significant amount of time and effort.

My Approach to the Project


In order to tackle this project, I have chosen to approach it in the following manner:

  • Thorough Preparation: Before applying the primer, I made sure the OBS board was clean, dry, and free of any flaws.
  • Primer Selection: Selecting the appropriate primer is critical for ensuring proper adhesion and durability. I chose a high-quality primer designed specifically for porous surfaces.
  • Rolling Technique: To effectively cover the entire board, I use a high-quality roller and an extending pole.

Adding Colours and Dimension

My client has asked me to paint the walls using a three-colour scheme. To achieve a clean, professional appearance, I will precisely outline the various colour sections using a laser. To accomplish this, careful planning and taping will be required in order to achieve clean lines and a sophisticated finish.

Conclusion

The project of priming a large OBS board is one that is not only difficult but also rewarding. You are able to achieve a finish that is both beautiful and long-lasting if you follow the appropriate procedures and make use of high-quality materials.

Below is a video that shows the stage I am currently at. Have a wonderful weekend.


All the Best,

Joseph Botelho

JFB Painting and Handyman Services


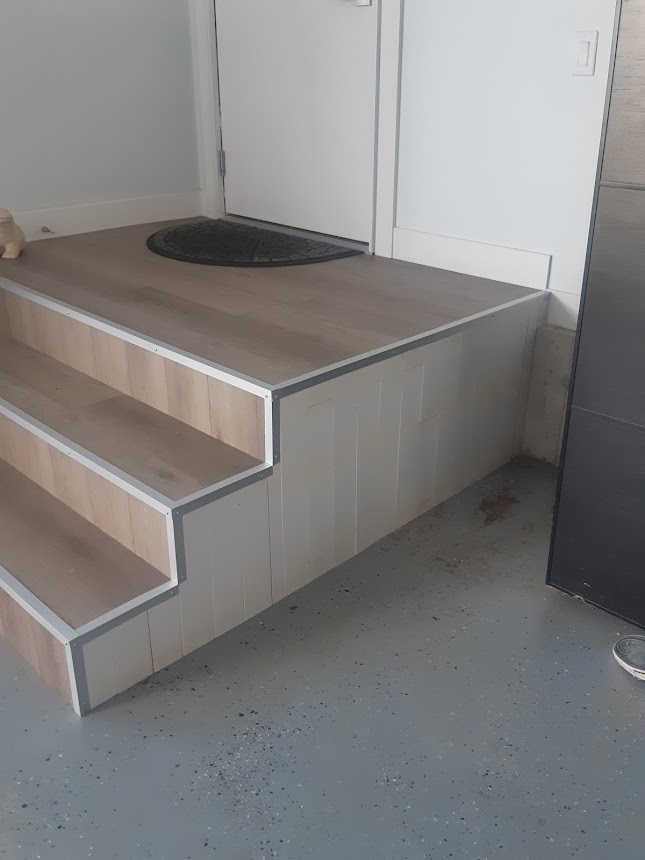
Stage I am at the moment

Regards,

Joseph Botelho


We appreciate you visiting our site and your comments on our subjects. Subscribe to our blog to get a copy of "Repair Smart: Money-Saving Maintenance Hacks for Homeowners." This ebook offers practical advice on how to control expenses for your do-it-yourself house renovations. Simply leave a comment to request a free copy of our ebook.

Request a complimentary copy of this ebook.


Wednesday, October 16, 2024

We are creating a garage using OSB as the material.


October 16, 2024


One often-used and adaptable structural wood panel is an oriented strand board. Designed from rectangularly shaped wood strands arranged in cross-oriented layers and waterproof heat-cured adhesives, OSB (Oriented Strand Board) is an engineered wood panel with many of the strength and performance qualities of plywood. 

What OSB (Oriented Strand Board) Looks Like

The amount of money my client is investing in this project does not take into account the amount of thought he is putting into it. This will be an intriguing project. The conversion into a mechanical shop for vintage vehicles necessitates accuracy.

Starting the ceiling

Before the OBS boards were installed, just the framing 


You can see the finished garage construction in the following video. This video will showcase the garage's size and the completed framing. Today's installation of the OBS will provide us with a clearer vision of its appearance before we begin painting. This will allow us to make more informed decisions.

Once all the boards are in their respective positions, we will begin painting. The first step is to prime the entire garage using BEAUTITONE PRIMER SOLUTIONS Interior/Exterior Acrylic Latex Block It Primer Sealer. For me to be able to cover all of the walls and ceiling, I will require seven gallons of this primer. I am going to wait twenty-four hours for it to dry before moving on to the next stage of the painting process.

This is the primer I will use for the best primer coverage with OBS

As you can see, the process of completing the OSB boards is currently underway. We have completed the walls, and the construction of the ceiling is nearly complete. Getting the entire garage primed is the next step that we will take. Once we prime everything, we will proceed to a more intricate painting task. To finish the ceiling, we plan to use a flat, white late ceiling paint. There will be three distinct colour combinations on the walls. Once we have measured six feet from the ceiling, we will paint it white eggshell. Next, we will apply a light blue colour to the next four feet, followed by a twelve-inch strip that will span the entire garage. Paint made from eggshell latex will be used to paint the final stage that is located beneath the strip in a dark blue colour once more.


How it looks at the moment: walls are all completed, and part of the ceiling is done


After we have begun the process of painting, I will update this post with additional pictures and additional information regarding how we carry out the process. I will use a laser to create precise lines, and I will use painting tape to achieve smooth and crisp lines. During the process of taping the lines on the bottom, I will add some dap to ensure that no paint goes underneath the tap. This will allow me to achieve a line that is clear and distinct.

If you have any questions or would like to provide us with some feedback, please do not hesitate to do so; we would be delighted to hear your thoughts on this project. If you follow our blog, you will be able to stay up to date on all of the posts that we provide for our audience.

Regards,

Joseph Botelho

JFB Painting and Handyman Services 


We appreciate you visiting our site and your comments on our subjects. Subscribe to our blog to get a copy of "Repair Smart: Money-Saving Maintenance Hacks for Homeowners." This ebook offers practical advice on how to control expenses for your do-it-yourself house renovations. Simply leave a comment to request a free copy of our ebook.

Request a complimentary copy of this ebook.


Friday, October 11, 2024

"Improving Your resident appearance With upgrading Your Baseboards"

 October 11th, 2024

Changing Your Residential Look with At a reasonable price, you can improve your baseboard installation and trim. We all grow weary of considering house repairs. We spot things that demand attention. This article is all about improving the value and look of every room, hall, corridor, etc. 

Tools Needed:

  • Measuring tape: To measure the length of walls and baseboards.
  • Carpenter's pencil: To mark cutting points on baseboards.
  • Mitre saw: for precise angled cuts, especially at corners.
  • Level: To ensure baseboards are installed evenly along the wall.
  • Brad nailer or hammer and nails: To secure baseboards to the wall.
  • Caulk gun and caulk: To seal gaps between baseboards and walls.
  • Putty knife: To apply caulk smoothly.
  • Sandpaper: To smooth edges and remove imperfections.
  • Digital angle finders are useful; they are easy to use and offer a wide selection.
Digital Angle Finder


What We Do and How We Do It:

Preparing the walls is crucial before we start your baseboard installation job. We start by precisely measuring the length of every wall you intend to have baseboard and trim installed. To guarantee a fresh canvas for your new installation, we remove any current baseboards, trim, or moulding. To create a smooth and even surface for the baseboards to stick to, when we nail it, we have thoroughly cleaned the walls, removing dust, dirt, and paint chips.


I always paint the trim and baseboards before installing them.


Baseboards painted first coat

Cutting and Fitting Baseboards and Trim:

Once the walls are ready, it's time to cut and fit the baseboards. For exact angled cuts at the corners, we use a mitre saw to guarantee a flawless, professional finish. Before we permanently secure the baseboards, we dry-fit them to ensure their fit and make any required cut adjustments. This stage will help prevent expensive mistakes and guarantee a perfect installation.

Placing baseboards on the wall


Secure Baseboards:

After cutting and fitting the baseboards, it's time to fasten them to the wall. To create a strong bond, start by laying building adhesive on the baseboard's rear. Use a hammer or brad nailer to secure the baseboard to the wall studs. For a neat and businesslike look, make sure the baseboard is flush against the wall and level. This stage will produce a long-lasting and robust installation.


Making sure they all look fit and level


Caulking and adding finishing touches:

Finally, caulk the baseboard-wall gap to polish your installation. This will produce a neat, unified appearance and seal any flaws. Smoothly and evenly apply caulk along the seam with a caulking gun. Allow the caulk to completely dry before sanding any excess or touching up the paint, if necessary. This last stage will guarantee a professional-looking installation that improves the whole visual appeal of your room.

As you can see flawless finish


Looking good


Nice and tight to fireplace wall


Now that the job is done, time to enjoy


Conclusion:

By adhering to these guidelines and advice, we can professionally install baseboards, trim, and enhance the visual attractiveness of your house. In addition to finishing your walls, installing baseboards helps to guard them from damage. Your living area will look great, and your guests will be impressed if you just give a little time and effort toward a neat, polished appearance. Go right ahead and request a no-obligation quote to update the inside of your house.

Regards,

Joseph Botelho

JFB Painting and Handyman Services


We appreciate you visiting our site and your comments on our subjects. Subscribe to our blog to get a copy of "Repair Smart: Money-Saving Maintenance Hacks for Homeowners." This ebook offers practical advice on how to control expenses for your do-it-yourself house renovations. Simply leave a comment to request a free copy of our ebook.

Request a complimentary copy of this ebook.


Tuesday, October 1, 2024

Paint Your Exterior Concrete Walls: A Guide to Enhancing Your Home's Curb Appeal


October 1, 2024

It is possible to significantly improve your home's curb appeal by painting the exterior concrete walls, which will also protect the concrete from weathering. I'll explain why you should think about it, as well as how to do it correctly.

Why Paint Exterior Concrete Walls?

How it used to look like


Why I decided to paint this wall


How it will look once it is all painted.


Protection: Paint acts as a barrier, shielding the concrete from moisture, UV rays, and pollutants that can cause deterioration.

-Aesthetics: A fresh coat of paint can instantly revitalize your home’s appearance, making it more visually appealing.

Increased Property Value: A well-maintained exterior can contribute to a higher property value when it comes time to sell.

How to Paint Exterior Concrete Walls

1. Preparation is Key:

Clean Thoroughly: Remove dirt, grime, mildew, and efflorescence using a pressure washer or a solution of trisodium phosphate and water.

Repair Damage: Fill cracks or holes with a concrete patching compound.

Sanding if Needed: In order to get rid of flaky old paint and other imperfections, it is possible that certain areas of the wall will require a light sanding.

Prime: Apply a concrete primer specifically designed for exterior surfaces. This will ensure better paint adhesion and durability.

I use a rope to pull back my shrub in order to paint behind the shrub


2. Choosing the Right Paint:

Acrylic Paint: Ideal for exterior concrete due to its durability, weather resistance, and ability to withstand temperature fluctuations.

Latex paint offers good durability and breathability, allowing moisture to escape from the concrete.

3.  Application:

Employing a paint roller and brush of superior quality will result in a finish that is uniform and smooth.
This technique involves applying two coats of paint and waiting for the first coat to dry completely before applying the second coat.


Weather Conditions: Paint on a calm, dry day to avoid wind and/or moisture affecting the drying process.

4. Maintenance:

  • Regular Cleaning: Wash the painted surface annually to remove dirt and debris.
  • Touch-Ups: Address any chips or peeling paint promptly to prevent further damage.

By following these steps, you can successfully paint your exterior concrete walls and enjoy the benefits of a more attractive and durable home.

The benefits of painting your concrete walls:

A new coat of paint can instantly revitalize the exterior of your home, making it more visually appealing and inviting. We call this enhanced curb appeal. Colour Personalization: You have the ability to select colours that complement your home's architecture, landscaping, and individualized style. Paint can camouflage relatively minor blemishes or imperfections in the concrete.

Protection and Durability

Paint acts as a protective barrier, shielding the concrete from moisture, ultraviolet rays, and harsh weather conditions that can lead to deterioration. This allows paint to perform the corrosion protection function.
Preventing Mildew and Mould Growth Proper priming and painting of a surface can effectively prevent the growth of mildew and mould.

Longer lifespan: Painting can extend the lifespan of concrete by shielding it from the elements and thereby extending its lifespan.

Increased Property Value:

Increased Market Appeal: If you take the time to meticulously maintain the exterior of your home, it will be more appealing to prospective buyers.

Higher Resale Value: Professionally painted exteriors typically fetch higher prices for homes.

The finished look of the painted wall


When choosing a paint for your exterior concrete walls, consider the following factors:

Adhesion: Select a paint specifically formulated for concrete to ensure proper adhesion and durability.

Durability: Look for paints that are resistant to fading, cracking, peeling, and chipping.

Weather Resistance: Choose a paint that can withstand extreme temperatures, humidity, and other environmental factors. 

Colour Retention: Opt for a paint with good colour retention to maintain its vibrant appearance over time.

Conclusion:

By painting your home's exterior concrete walls with superior paint, you're not only improving the look of your house but also safeguarding its structural integrity and increasing its overall value. A well-painted exterior not only improves curb appeal but also keeps moisture-related problems and mould growth at bay, making the interior a healthier place to live. Furthermore, a new coat of paint can lower energy expenses by increasing insulation and reflecting sunlight. In the end, painting your external concrete walls is a wise investment that will benefit your home's appearance, usability, and value for years to come.

Please do not hesitate to contact me if you have any questions or are interested in having work done, such as painting, flooring, or a variety of other handyman tasks.

Regards,

Joseph Botelho


We appreciate you visiting our site and your comments on our subjects. Subscribe to our blog to get a copy of "Repair Smart: Money-Saving Maintenance Hacks for Homeowners." This ebook offers practical advice on how to control expenses for your do-it-yourself house renovations. Simply leave a comment to request a free copy of our ebook.

Request a complimentary copy of this ebook.


Wednesday, September 25, 2024

"Discover How to Complete Your Honey-Do List and Make Your Partner Happy"

September 25, 2024

How to Make Your Spouse Happy: Finish Your Honey-Do List

Are you fed up with a never-ending list of tasks that keeps expanding? Would you like to brighten your partner's day (and potentially receive some additional gratitude)? It's time to tackle those nagging honey-do projects.

Why Outsource Your Honey-Do List?

  • Save time and energy by letting a professional handle the tedious tasks, allowing you to relax or spend quality time with your family.
  • Ensure guaranteed quality by hiring experts with the necessary skills and experience to complete the job correctly the first time.
  • Peace of Mind: Knowing your honey-do list is being taken care of can reduce stress and tension at home.

Common Honey-Do Projects

  • Painting: Ceilings, baseboards, trim, and rooms can all benefit from a fresh coat of paint.
  • Baseboard and Trim Upgrades: Update your home's interior with stylish new baseboards and trim.
  • Door Repair: Fix squeaky, sticking, or damaged doors for a smooth and functional home.
  • Faucet Replacement: Upgrade your kitchen or bathroom with new faucets for improved style and function.
  • Wall and Ceiling Repairs: Patch holes, cracks, or water damage to restore your home's appearance.
  • Electrical Updates: Replace outdated light switches and receptacles for safety and convenience.

Let Us Help You

No matter how big or small your honey-do list is, we can help you get it done. Contact us today for a free, no-obligation quote and let us take care of those pesky projects.

Why Choose Us?

  • Experienced Professionals: Our team has years of experience tackling various home improvement tasks.
  • Quality Workmanship: We guarantee high-quality results that will exceed your expectations.
  • Affordable Rates: We offer competitive pricing without compromising on quality.
  • Customer Satisfaction: Your satisfaction is our top priority.

Don't Let Honey-Do Projects Stress You Out

Let us handle your honey-do list while you enjoy a more relaxed and harmonious home life. Reach out to us now to arrange a consultation and initiate your home enhancement journey.


Upgrading your baseboards or trim

Changing the look of your wall by adding a portable fireplace and your TV

Adding bi-fold doors to your closet

Improving the look of your side entrance

Painting your garage doors

Changing the look of your stairs


Contact us now.

jfbmarketing@gmail.com
647-244-7891


We appreciate you visiting our site and your comments on our subjects. Subscribe to our blog to get a copy of "Repair Smart: Money-Saving Maintenance Hacks for Homeowners." This ebook offers practical advice on how to control expenses for your do-it-yourself house renovations. Simply leave a comment to request a free copy of our ebook.

Request a complimentary copy of this ebook.


Monday, September 9, 2024

How to install a cat door on an existing interior door.

September 9, 2024 

How to install a cat door on an existing interior door.

This article will describe the process of installing a cat door in conjunction with an existing interior door.
After the installation is completed, your cat or small dog will be able to enter any room that you choose. It enables your pet to enter without requiring you to open the door, thereby granting her the freedom she deserves. Use this great idea to benefit yourself and your pet. Discuss the steps needed to start this project.

First step:

There is a wide variety of options available to you when selecting the door that you want to have installed. It occurred to me that Amazon offers a fantastic selection of cat doors at affordable prices. You can look around and see all of your options, prices, and detailed instructions for completing the task.

Second Step:

The majority of hinges have three or four screws attached. We previously mentioned removing the door from its jams as the next step. It appeared to be much simpler to remove the center bolt that was holding the two hinge screws apart than it was to simply remove all of the screws and leave the hinge attached. Your choice will save you time and be the most suitable for you.

Step Three:

Immediately after removing your door, avoid hitting it or leaving dents or marks. Position the door on a safe, level table; I used a black and decker worktable for this purpose. Once the door is in a flat position on the table, mark the centre of the door and prepare to take measurements. Next, position your template in the centre of the door, ensuring it aligns with the bottom of the door located inside your home.


Step Four:

If you have a template, apply paint tape to its outside. This will prevent your jigsaw from leaving a scratch on your door's exterior. This method not only saves time and ensures a neat process, but it also eliminates the need to touch up the door with the same paint color as your interior door. This is a significant benefit.


Step Five:

You will cut around the template with a jigsaw blade that is of high quality and sharpness. If you want your cut to have a pleasing finish, you should go very slowly for it. Please keep in mind that there will be a piece of wood that serves as a support at the bottom of the door. As soon as you have cut that piece, the remaining portion of the door ought to be hollow and relatively simple to cut.

Step Six:

After you have cut the opening for the door, you may want to lightly sand it to ensure that it is smooth and well-finished before you put together the two sections of the cat door. To position the cat door piece's opening, begin at the back of the door and then gently flip it over. After that, manually install the screws using the provided hardware. Do not make use of a drill.


Step Seven:

Test the door to confirm its correct opening and secure fastening. If everything goes according to plan, you are well on your way to the final stage. After mounting the door, place it back on the door jambs.

Step Eight:

I hope this was helpful. If you have any questions, I would appreciate it if you could send me a message. Or if you would like to provide some feedback by leaving a comment.


 Conclusion

Installing a cat door on an existing door offers numerous advantages for both cats and their owners. Cats become more independent, have access to exercise and fresh air, and can relieve themselves when necessary, all of which help them feel less stressed and anxious. Cat doors are convenient for owners, shield doors from harm, and help keep the house cleaner. The overall benefits of a cat door make it a worthwhile addition to many homes, improving the wellbeing of both cats and their human companions, even though it's crucial to take into account aspects like security, weatherproofing, and initial training.

Regards,

Joseph Botelho


We appreciate you visiting our site and your comments on our subjects. Subscribe to our blog to get a copy of "Repair Smart: Money-Saving Maintenance Hacks for Homeowners." This ebook offers practical advice on how to control expenses for your do-it-yourself house renovations. Simply leave a comment to request a free copy of our ebook.

Request a complimentary copy of this ebook.


Friday, July 5, 2024

How to stain and understand the steps to take to properly stain like a pro

May 5th, 2024

Staining wood can be done with a professional finish! Here's a breakdown of the steps involved, with a focus on using a brush: Understanding the procedures will ensure that your project turns out beautifully. Staining wood differs greatly from painting. 

We will go over all you need to know and how you will be impressed by your results. 

Preparation is Key:

Sanding:

This produces a surface that is smooth enough to absorb stains evenly. For wood that has already been finished, use 120-grit sandpaper; for bare wood, use 80-grit; and for all surfaces, use 180-grit. Use a tack cloth to remove dust.

Give your wood a smooth sanding


Pre-conditioning (optional):

Use of a pre-stain conditioner should be considered for softwoods such as pine. This lessens the likelihood of applying blotchy stain. Apply using a foam brush, allow to dry as directed by the product, and then remove any leftovers with a clean cloth.

How to apply the stain:

Brush Choice:

Synthetic brushes are appropriate for water-based stains, but natural bristle brushes perform better on oil-based stains. Select a premium brush with non-stretching, soft bristles. This is a crucial choice that will affect the kind of stain you use. 

One of the best brushes for applying stain is a natural bristle brush because it can be cleaned and used again for several projects. The best brushes to use with 100% acrylic and oil or acrylic stains are synthetic ones. It's not like natural bristles that will go limp.

My choice for staining


Stain Application:

Before using the stain, always give it a good stir. Stain should be applied in light, even coats, following the grain. Use a fresh, lint-free cloth to quickly wipe away any excess stain in the direction of the grain. Using these techniques will enhance the finished look of your work. 

Building Colour:

For a deeper colour, apply additional thin coats only after the first coat has completely dried (see the stain can's drying time). Recall that adding more stains is simpler than removing them.

Expert Advice on Brushwork:

Let's go over the procedures you must adhere to in order to finish any project you undertake flawlessly. Whether you're staining a wooden swing set, a deck, or any other wood project you've got planned,.

Work in sections: To prevent uneven drying, apply stain to small, manageable sections at a time.

This is the correct way to stain

Incorrect way, you can see the uneven application of the stain 


Maintain a wet edge: To guarantee even application, dip your brush frequently and leave a wet edge on the stain as you work.

Wipe thoroughly: It's imperative to remove excess stains as soon as possible to achieve a polished appearance. Keep the stain from collecting on the surface. One of the most common mistakes people make when staining is this:.

Clean your brush: After staining, store your brush carefully after giving it a thorough cleaning with the suitable solvent (water for a water-based stain, mineral spirits for an oil-based stain). To keep your brush wet until I need it again, I wrap it in saran wrap while I'm taking a break. 

Additional Tips:

Testing the Stain:

Test not only the stain colour but also the wiping times! Stain a scrap piece, allow it to sit for varying amounts of time (30 seconds, 1 minute, 2 minutes, etc.), and then remove it with a cloth. This will demonstrate how the stain penetrates the wood and how the length of time you leave it on before wiping affects the final colour.

Drop Cloth Magic:

Use a plastic drop cloth that drapes over the floor and has slightly folded edges for the best results. This will capture any spills or drips and simplify cleanup. Another useful trick with painter's tape is to draw straight lines around the edges of your workspace to keep stains from seeping onto surfaces you don't want coloured.

Ventilation Ventilation Ventilation:

This only applies if you are working indoors; otherwise, take safety measures. Stains can release strong fumes, particularly those that are oil-based. To promote proper air circulation, open the doors and windows. Try to work outside on a day with little wind. When handling stains, always wear a respirator made for organic vapours, and make sure you follow the manufacturer's instructions for safe usage. 

Conclusion

You will obtain results that a professional would provide if you follow the above steps. This deck serves as an illustration of a stain job done differently. The difference will be apparent to you right away. While one section was completed erroneously, the other section adhered to the right procedures.

You will notice the difference with the staining process

Feel free to leave your feedback or any question you may have. 


Regards,

Joseph
JFB Painting and Handyman Services. 

We appreciate you visiting our site and your comments on our subjects. Subscribe to our blog to get a copy of "Repair Smart: Money-Saving Maintenance Hacks for Homeowners." This ebook offers practical advice on how to control expenses for your do-it-yourself house renovations. Simply leave a comment to request a free copy of our ebook.

Request a complimentary copy of this ebook.


Full-Scope Painting and Handyman Services:

"The Secret to Saving on Home Improvements: It's in Your Appliances"

December 28, 2024 Making sure your appliances are functioning properly is a crucial part of a multifaceted approach to cost-cutting home upg...